Saturday, March 20, 2010

Matryoshka Doll Stationary


I was so excited to receive a gift card to the Lil Blue Boo shop for winning 3rd place in the Design Challenge. I have been eyeing these adorable Matryoshka graphic images for a while now. Ashley from Lil Blue Boo designed them herself (by using Power Point)and makes beautiful screen prints out of them for her dresses. I have yet to try screen printing, but am itching to do it! One of theses days! I used part of my GC on the images. So when she sent them to me she mentioned that they could be used for a number of things including stationary. I tried it and LOVE it! I think they made the cutest stationary. I bought a pack of ten note cards with envelopes from Michaels. They were $4.99. If you use your Sunday paper coupon you could get 40% off that. What a steal! I personalized the stationary and envelopes for both my girls and a family one too.


I had to tape the side of the envelope so it wouldn't get caught in the printer. I have a very temperamental printer!


I also made gift tags for gifts. One thing I dislike spending money on is cards. Some of them are $5.00. So these gift tags are a great alternative!


So here is what I did...
-downloaded the images
-opened a word document
-inserted the picture from my files
-Sized the image how I wanted it(The images are high resolution. They can be made very small or large).
-Added a text box where I inserted a name/monogram
-Arranged the text box so it was in front of the text(image)
-Chose the font/color I liked for the text
-Printed a test sheet
-adjusted if need be
-saved it for future use
-Printed it on my stationary!

I played around with them a lot to get it exactly how I wanted it! It does take some time and patience, but once you have it where you want it you are good to go! I think they would make awesome gifts too!

From Burnt to Beautiful

I noticed this the other day...
Yes, burn marks on my decorative dish towels. Hmmm how did that happen?? It looks like someone used my towel as an oven mitt. I don't like to place blame so I am not inferring Dad of two giggle boxes did it (although he is the one that cooks:)). I thought about pitching them. We have had them for 4 years, so it might be time for some new ones. However, we received them as a shower gift for our wedding and I like them, so there was only one option...cover the burn mark! I dove into my ribbon box and pulled out some brown grosgrain ribbon and decorative trim.
Pinned it onto the towel, stitched it up and got this!
I actually like them better than I did before!

Friday, March 19, 2010

Seersucker for Spring and Summer


Nothing spells spring and summer like seersucker! I recently made this gator seersucker John John for a customer and became excited about the warmer days lurking around the corner! This lightweight cotton fabric is perfect for those long summer days on the beach or running through the sprinklers.


I can't get enough seersucker! Also available: Whale Seersucker embroidered John John

Tuesday, March 16, 2010

Baby Food: You can make it too!


Two years ago when Carson was about to begin eating "solid" foods I went to the book store to look for a book on making my own baby food. Mind you I am not a cook, whatsoever! I have a fabulous husband (dad of 2 Giggle Boxes) who plans our meals out each week and does the grocery shopping. He is a saint, I know. We would be eating frozen dinners every night if it was up to me. Anyway, I thought I would take on this task. I came upon the section in the store with books about making baby food, but WOW was I overwhelmed by the number of books! There was another mother there who recommended "Super Baby Food" by Ruth Yaron. It is 560 pages of oodles of information. It has everything from choosing foods, preparing foods, making and storing foods, recipes, to health/safety tips and even fun activities you can do with your kids. So I bought it and gave it a whirl! It was super easy to follow. The book is broken down by feeding your baby at 6,7,8, etc. months, what foods are good for each month, how to choose, clean, make and store each type of food.

Now two years later I am at it again with Clara. Many people would ask me if it is a pain in the rear end and assume that it takes hours of labor in the kitchen, but it doesn't! What I do is buy several different kinds of fruits and veggies and make an afternoon of it. Many of them last up to several months in the freezer. When your baby is hungry you pop a cube or two into the microwave and serve!

I of course consulted our pediatrician before I began making any baby food!

What you need: fruits, veggies, ice cube trays, food processor, oven/microwave/steamer
The process in a nutshell:
-Clean and Prepare
-Steam, microwave or bake fruits/veggies
-Put in a food processor
-Put in ice cube trays, cover and place in freezer
-After they are frozen pop them into a freezer bag
-Mark the freezer bag with the date made and the expiration date (most last 2-3 months in the freezer and a few days in the refrigerator).
-Pop in microwave and serve!

If you have a little one you should try it! I think it's a great way to introduce a baby's first foods and offers much more of a variety than store bought baby food.

Here are some pictures of more food and Clara enjoying it!
Sweet Potatoes

Bananas...so easy! Just peel and puree!

MMMM...Bananas!

Mix it with a little yogurt...

And enjoy!

Sunday, March 14, 2010

The Skirted Onesie: A Tutorial

I love skirted onesies!

They are cute, comfortable and you can do so much with them as far as style and embellishing goes! I have made gameday onesies, onesies with ruffles, appliques, embroidery, layers, etc.
Take a look...
I made this skirted onesie from an old, stained dress. I love making some old into something new!


Materials: Old dress or fabric (a fat quarter will work), rotary board, rotary cutter, sewing machine, coordinating thread, and onesie

First, decide where you want the skirt to fall. If you want an empire/babydoll style skirted onesie you are going to cut the onesie an inch or so under the arm. I chose to cut my onesie a few inches above the hip.
I usually use my rotary cuter, but it broke:( So I used my trusty scissors.
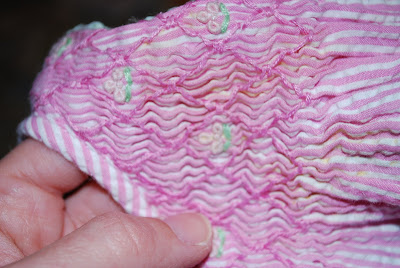
I cut the dress right under the smocking.
Sewed right sides together and finished the edges with a serger or you can zig zag stitch.
Sewed a gathering stitch and gathered.
Then take the top portion of your onesie and the skirt. Turn the skirt inside out and stick the onesie inside the skirt like so....then pin.
And sew.
Then take the skirt and top portion of the onesie (they are now attached) and bring the skirt so that it is laying on top of the onesie like in the picture above. Next take the bottom portion of the onesie and turn it inside out and slip it over the skirt (make sure that the bum part is facing the correct direction or you could end up with the bum in the front).
And sew. Finish with zig zag stitch.
Now to embellish! I thought the edging around the arm holes would make cute flowers for the onesie so I cut them out.
Here they are! I cut each one in half.
Then I took a piece of scrap from the dress and used it as a backing to sew the flower.
Then I pinned it to the skirt and top of the onesie and sewed!
And here it is...Again! But this time it's on my lil' Giggle Box!


Related Posts with Thumbnails