Saturday, January 29, 2011

Chocolate Covered Pretzels


My sisters and I are throwing a baby shower for the upcoming birth of our new nephew. The theme is Diapers and Desserts! What to make for my dessert...chocolate covered pretzels! It was so simple and I love the sweet and salty combination. This is what you need...

semisweet chocolate chips
white chocolate chips
pretzel rods
sprinkles
plastic baggie
scissors
aluminum foil
microwave safe bowl
food coloring
Before you get started cover a cookie sheet in aluminum foil. 
Pour your chips in a microwave safe bowl. I split my chips in half...half white and half will be blue.

Add a little crisco, about a table spoon for 12 oz of chips. If you split it in half like I did you will just use a half of a tablespoon.

Put it in the microwave for about a minute, then stir. If need be, put it in the microwave for another minute.
 I added food coloring...
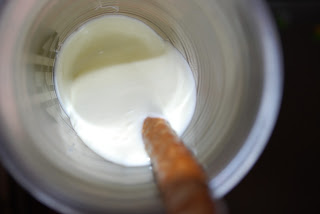
 Then the other half for the pretzels. I transferred the chocolate in a tall glass to help with the dipping process. After you dip place them on the covered cookie sheet.

If you are going to put sprinkles on them do it right after you dip them. I waited a little too long and they didn't stick as well as I would have liked.
Next, place them in the refrigerator. After the chocolate hardens you are ready to drizzle the colored chocolate.
 I placed my blue chocolate in a baggie and snipped the tiniest hole in the bottom corner.
 Then I drizzled...
Place them back into the refrigerator until you are ready to serve! 

I displayed them in some lowball cocktail glasses. To spruce up the glasses I wrapped them with some blue polka dot ribbon.
 ENJOY!

Tuesday, January 25, 2011

Car Seat Makeover: A New Ride

Ahhh....I can finally cross this off my "Want to Try" list! YAY! Although I have had recovering a car seat on my list for over a year now, I really didn't have a pressing reason to redo it. Now I am in a bit of a time crunch because my brother's baby, baby boy, is due in March and we are throwing a baby shower for him this weekend! So 3 days(about 12 hours) later the pink, infant car seat that I have used for both of my girls went from this....


to this...

I just love the back and white circle dots from Robert Kaufman's Metro Living fabric collection.

I used a tutorial from Puking Pastilles to help guide me. I wasn't recovering the same type of car seat she did, but it did help. A lot of the process was documenting what goes where. I took several pictures as I dissected it.


 I didn't end up taking the entire canopy apart. I just replace the fabric around the edge.


I also left the fabric in the middle of the seat. It was black and in good condition so it worked! And saved me a little time!

Although time consuming and tedious, I am pleased with the final result and feel a sense of accomplishment! I had mixed emotions about recovering it to give it away. I was happy to do it knowing it was going to my new nephew, but sad because my girls are getting bigger and giving it away means that I they won't need it anymore. 

Here they are testing it out and fighting over who gets to sit in it! I don't think they want to give it up either, but it has to happen sooner or later.

I hope that baby boy enjoys his new ride!

On another note...I would like to thank my mom for watching the girls the past two days and twelve hours...thanks mom!
Related Posts with Thumbnails