Thursday, March 31, 2011

2nd Entry for the Lil Blue Boo/Dharma Trading Co. Challenge

Circus Seal...

I have had an idea of what I have wanted to do with my 2nd entry for the challenge since January. Of course I have procrastinated until TODAY (the last day to enter the challenge) to finish my project. But it all worked out. Carson hung out in my room with me while I sewed and Clara napped. I finished just as Clara was waking up, tried the outfit on her and took pictures right before the monsoon came. 

I chose to do a circus themed outfit. The idea popped into my head this past January when the circus was in town. Who doesn't love the circus?!  Everything about the circus is exciting...animals, performers, costumes and music, not to mention the delicious cotton candy and popcorn. 

A few days later I was browsing all of the yummy fabrics and saw this colorful summer time fabric by Barbara Jones. It was perfect. I love the mix of dark and light colored polka-dots. I imagined the circus animals and performers...jugglers, elephants, lions, seals, etc. I thought it would be neat to turn the dots into balls for the performers/animals. After browsing some pictures I decided to use the seal and have him balance a "ball" on his nose. This elephant is super cute too!


I used the freezer paper stencil method for my seal applique. I thought I took pictures, but I can't find them...sorry. I will have to do it again, maybe one for Carson this time.

There are several tutorials online for using freezer paper for stenciling. Ashley has a great one here.
In a nutshell...I traced my seal onto the freezer paper and used an exacto knife to cute it out. Then I ironed it onto the fabric and painted (using fabric paint). I let it dry and lifted up the paper. Then I hand painted around the "ball" and the star in the middle of the "ball"

I took the painted, scrap fabric and made it an applique. Then embellished it with a ruffle (from the coordinating fabric on the bubble skirt-Pouty Princes) and black ric rac.  It was an easy way to spice up an outfit. And I have to say that I LOVE this bubble skirt. I will definitely be making more!

Clara was a great model today. As anyone who has a toddler knows, taking pictures can be quite the ordeal!  But today...
She sat...

 and smiled...

 twirled around a bit...
 and showed off her teeth.
Thanks for being such a good girl! I love you!

Can't wait to see the rest of the entries. There have been so many fabulous ones so far. I love looking at everyone's projects and reading the thoughts behind them. Each one is so unique. You should head over to Lil Blue Boo and check them out! Thanks for stopping by!
~Sarah

Friday, February 25, 2011

Birthday Girl: Parisian Style

Bonjour!
Happy Friday everyone!! This weekend (like most every weekend:))we are attending a birthday party for a family friend. I saw this material at my favorite local fabric store and thought it would be perfect for the birthday girl. I love the black, red and white color combination. Carson (and her doll "Sarah") was so kind to model. It only took 30 minutes and a bribe for her to comply.
I used the peek-a-boo skirt pattern from Little Lizard King. It also has a matching doll skirt. I couldn't resist!
 What little girl doesn't want her dolly to dress just like her? I used a newborn onesie for the doll's shirt which I also monogrammed to match the birthday girl's shirt.

 I often like to give a book as a part of our gift. I thought "Eloise in Paris" is the perfect addition to the outfit. Little Eloise is sure to have a blast exploring Paris and all it has to offer. I thing Eloise might have enjoyed wearing this skirt while she caused mayhem throughout the streets and historic sights like the Eiffel Tower, Etoile and Louvre.

Carson enjoyed reading the book to her doll. I hope the birthday girl does too! Have a great weekend everyone! 

PS I hope to share pictures from our adventures last weekend soon! We went swimming with the manatees and to the Fair!

Saturday, February 5, 2011

1st Entry: LBB/Dharma Trading Company Design Challenge

Lil Blue Boo is challenging all to get creative! You can design anything your heart desires. You also have to use a creative technique such as...

We live near the beach and go there quite often. So I wanted something that was wearable, comfortable and cute! I used this pattern as my starting point. And this picture as my inspiration as well as this project from last week.

I added a top piece, halter straps, embellished it with ric rac (at the top and midsection) and a seahorse applique. 


Here are the girls showing off their ruffles. They were prancing around like little peacocks!

Georgia is being silly here. I just love this picture! 


Clara from the back and Georgia from the front.

You should take on the challenge too! I can't wait to see what all the other contestants create! There is sure to be a sea of fabulous projects. If you feel the itch click on the button below for details...


Tuesday, February 1, 2011

Vintage Beach Baby

I have been following Project Run and Play for the past few weeks. If you haven't been over, check it out. There is tons of inspiration from both the designers and readers.

This weeks challenge is retro and vintage! During the week, before the designers reveal their creations, the readers can also participate and post pics of their inspired looks. I found this pattern on etsy. I didn't buy it, but it was my inspiration for my vintage beach look. I just love all those bum ruffles and that sun bonnet! 

We go to the beach a lot during the spring and summer. We had already planned on going to the beach today with friends, so I thought this would be a the perfect outfit for Clara to romp around in the sand.
I also like this, but I don't crochet.

I had previously cut bloomers using this fancy pants pattern from Little Lizard King. So I just had to add a piece to create a top. It's funny how projects seem to evolve.  

Did I mention I love all those ruffles...
I added a little lace at the top of the neck and the midsection. What's a vintage outfit without a little lace?

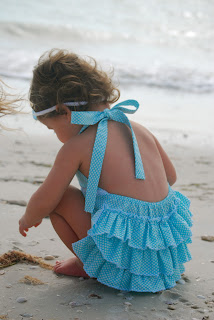
Here is Clara modeling her vintage beach look.
 She looked for seashells as I snapped away.


Can't wait to see everyone's vintage looks! Have a great night!

Saturday, January 29, 2011

Chocolate Covered Pretzels


My sisters and I are throwing a baby shower for the upcoming birth of our new nephew. The theme is Diapers and Desserts! What to make for my dessert...chocolate covered pretzels! It was so simple and I love the sweet and salty combination. This is what you need...

semisweet chocolate chips
white chocolate chips
pretzel rods
sprinkles
plastic baggie
scissors
aluminum foil
microwave safe bowl
food coloring
Before you get started cover a cookie sheet in aluminum foil. 
Pour your chips in a microwave safe bowl. I split my chips in half...half white and half will be blue.

Add a little crisco, about a table spoon for 12 oz of chips. If you split it in half like I did you will just use a half of a tablespoon.

Put it in the microwave for about a minute, then stir. If need be, put it in the microwave for another minute.
 I added food coloring...
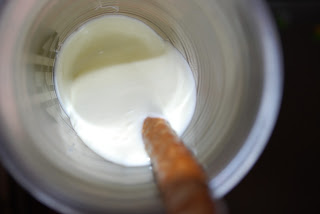
 Then the other half for the pretzels. I transferred the chocolate in a tall glass to help with the dipping process. After you dip place them on the covered cookie sheet.

If you are going to put sprinkles on them do it right after you dip them. I waited a little too long and they didn't stick as well as I would have liked.
Next, place them in the refrigerator. After the chocolate hardens you are ready to drizzle the colored chocolate.
 I placed my blue chocolate in a baggie and snipped the tiniest hole in the bottom corner.
 Then I drizzled...
Place them back into the refrigerator until you are ready to serve! 

I displayed them in some lowball cocktail glasses. To spruce up the glasses I wrapped them with some blue polka dot ribbon.
 ENJOY!

Tuesday, January 25, 2011

Car Seat Makeover: A New Ride

Ahhh....I can finally cross this off my "Want to Try" list! YAY! Although I have had recovering a car seat on my list for over a year now, I really didn't have a pressing reason to redo it. Now I am in a bit of a time crunch because my brother's baby, baby boy, is due in March and we are throwing a baby shower for him this weekend! So 3 days(about 12 hours) later the pink, infant car seat that I have used for both of my girls went from this....


to this...

I just love the back and white circle dots from Robert Kaufman's Metro Living fabric collection.

I used a tutorial from Puking Pastilles to help guide me. I wasn't recovering the same type of car seat she did, but it did help. A lot of the process was documenting what goes where. I took several pictures as I dissected it.


 I didn't end up taking the entire canopy apart. I just replace the fabric around the edge.


I also left the fabric in the middle of the seat. It was black and in good condition so it worked! And saved me a little time!

Although time consuming and tedious, I am pleased with the final result and feel a sense of accomplishment! I had mixed emotions about recovering it to give it away. I was happy to do it knowing it was going to my new nephew, but sad because my girls are getting bigger and giving it away means that I they won't need it anymore. 

Here they are testing it out and fighting over who gets to sit in it! I don't think they want to give it up either, but it has to happen sooner or later.

I hope that baby boy enjoys his new ride!

On another note...I would like to thank my mom for watching the girls the past two days and twelve hours...thanks mom!
Related Posts with Thumbnails