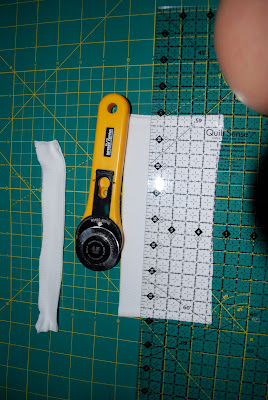


Materials: 3 coordinating fabrics, tank top, thread, sewing machine or serger, pins, scissors, rotary board, rotary cutter, and ruler
1) Cut your tank top 2/3 inches under the arm hole.
2) Cut 4 strips. The first one 4x44 inches, second one 2x44 inches, third one 3x44 inches and the fourth one 1x44 inch (unless you are using a sewing machine. You will want to cut 1.5 inches. The .5 inch will be for the hem).
Totaling 10 inches. You will loose about an inch with seam allowance. If you want to make a dress you will lengthen it as you see fit.
3)Take each layer and fold in half. Cut the side so you now have two pieces of fabric instead of one. You will have seams on both sides.
4)Sew/serge one end Right sides together. Repeat for each layer. Now you have one long piece with a seam in the center.
5)If you have a serger and would like the seams to be on the outside you will serge layer one to layer two wrong sides together. If you are sewing you will sew right sides together. Repeat for each layer until you have ONE piece of fabric with 4 layers. If you have a pattern that should be facing a certain direction make sure it's the way you want it before you sew (eg. I have birds and I don't want them upside down).
If you are using a sewing machine you will want to hem the bottom at this time. Fold bottom layer 1/4 of an inch and iron. Then 1/4 of an inch more and iron. Sew to hem.
6) Sew/serge the end right sides together
7) Use a basting stitch, and gather so that it is the same width of the tank
8)Fold the skirt up over the tank so that right sides are facing one another.
9) Line up the seams on the dress with the seams on the tank. Pin all the way around.
10) Sew and finish the edge with a zig zag stitch or serger
10) Press
Finished with the shirt portion! Now for the ruffled neckline...
Take your "leftovers" from the tank top.
Cut 3 1 inch strips from the tank.
Cut the strips at the seam and sew all of the strips together into one long strip.
Use a basting stitch down the center of the strip, and gather
Pin to the neckline of the tank
And Enjoy!
I had so much fun making this one I made 2! One for Carson and one for the Shop.


10 comments:
You have to have the best dressed kids in town :) It sounds so easy, I wonder ho badly I can mess it up LOL. I am really uncrafty.
So cute! Great Job.
Love this! Bookmarking to make for my little girl! Thanks for sharing!
Adorable! I will definitely be making one of these!
Your blog is fabulous. I found this on the skip to my lou linky and i am trying so hard to learn to sew..i dont know how to do all the different stiches and i dont even know if my sewing machine does serging stuff (doubtful, right?) but im going to try the more basic crappy version of what you have and see if i can do it. LOL!
trisha
momdot.com
Gosh! I cant believe I only just found you! I saw your dress on One Pretty THing, and I am hooked! YOu are so talented!!!! love love love what you do!
Darling!!
Thanks everyone! Let me know if you have any questions. Trisha, I will do a tutorial just using the sewing machine and more detailed pictures with the basting stitch. Your version will look fabulous!
So cute! Love the details! If you'd like, this would be perfect to link up to my Thursday party Make It Wear It especially for things made to wear!
TheTrainToCrazy.com
i love this. especially the ruffled neckline detail.
thanks for this tutorial.
i'm linking.
doro.
Post a Comment