Showing posts with label things I've Made. Show all posts

Saturday, September 25, 2010

For the Birthday Girl

We are attending a birthday party tonight for one of Clara's first friends...Miss Georgia! I can't believe that they are both one! I remember their first play date like it was yesterday. They had lots of fun getting to know each other...
Now they are both mobile and enjoying things like the aquarium and chewing on inflatable swords!
Georgia, we are so excited to celebrate your special day with you!

Georgia's mommy and daddy both went to Arizona University, so it's only fitting I made her this to show her school spirit and cheer on her Wildcats! I have made lots of skirted onesies, but have never made one with an empire waist style..


"Bear Down" was embroidered on the front of the dress as it is the official motto of UA. It also has a little ruffle around the bottom for that extra bit of femininity and fun! I really like the empire look and will be making more!
I also made the birthday girl this!
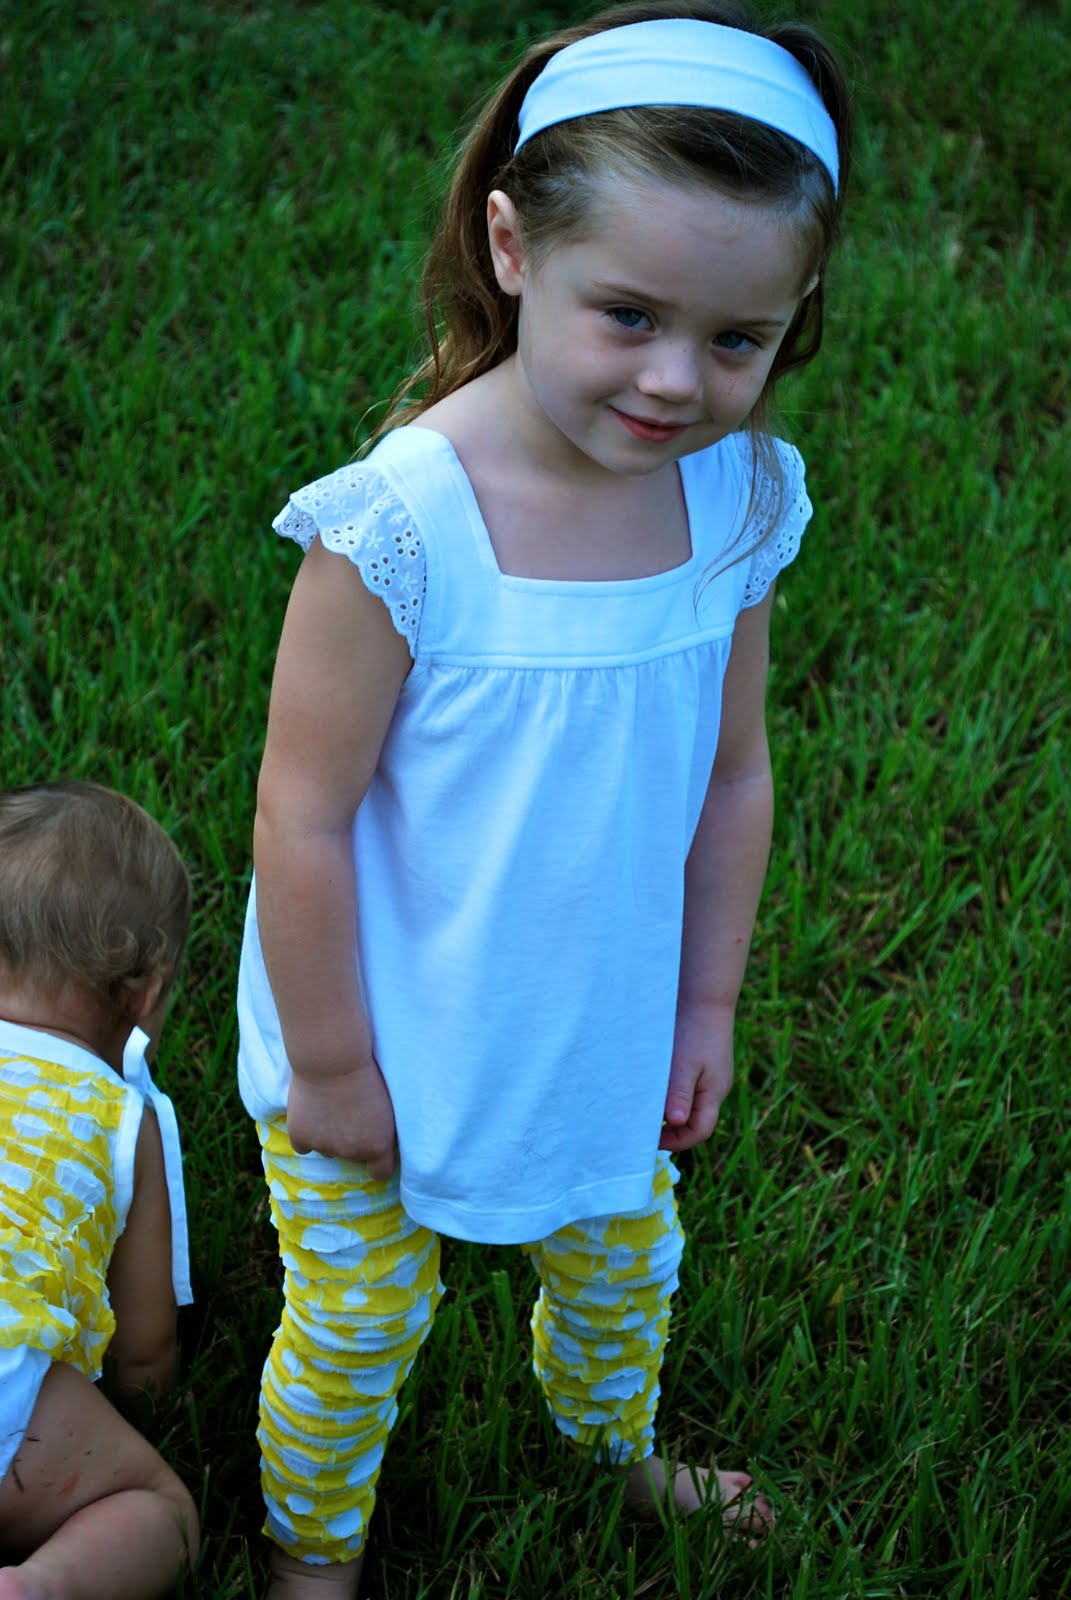
I love owls and made two other little birthday girls these a couple weeks ago. I used Ashley's owl download. I have since made my own owl modeled after the little owls on the fabric. I loved the flowers for eyes and their little wings. I make the owls larger/smaller depending on the size of the shirt.

I have been selling them in the shop, but really made the very first outfit with Georgia in mind. I saw these cute little guys at JoAnn fabrics and had to have them.
I paired the owl knit fabric with some stripes and polka-dots. I made a pair of mismatched leggings for those chilly Florida days. We do have a bit of cool weather in October and November (can't wait for those days).
I hope you have a fabulous birthday Miss Georgia! We love you!

Thursday, August 26, 2010

Covered Button Flip Flops

Clara's birthday party is this weekend! We decided on a small family party to celebrate her big day. I say small, but with my siblings, their spouses, nieces, nephews and grandparents it ends up to be about 30 people!

While planning our intimate gathering I was trying to decide what to do for take home gifts. Upon a trip to Old Navy I found flip flops...for 97 cents! I couldn't pass that up. I know fall/winter is right around the corner, but we live in Florida and pretty much wear flip flops year round. So, I bought them for the girls. Now what to do with them? I embellished these last spring, but wanted something a little more juvenile. I saw some covered button book marks in a Hallmark the other week. They were adorable and would look just as cute on a pair of flip flops! So here they are!

They were really quick and easy and if you don't have an embroidery machine they would look just as cute with a bright, colorful fabric choice. I used the same way to apply the button as in this tutorial (DMC thread and hot glue gun).

If you have never used a covered button before it's really easy. Here is a quick demonstration...
There are two choices for covered buttons...the kit and the refill. If you have never purchased the kit you will want to get that first. It is a little more expensive, but comes with the necessary parts you need to assemble the button. Here are the supplies. I used a little spray adhesive on the fabric because I wanted the initial to be centered and the adhesive kept the fabric from slipping. I used 7/8" covered buttons. I purchased the kit for about $3.25 and the 2 packs of refills for $2.25. There are 4 buttons in each of these packs. All together the flip flops were less than $2.50!
I drew circles. The kit comes with a template on the back. I couldn't find mine so I just guessed.
Cut your circles out.
Sandwich the fabric between the white, rubber piece and the top of the button.
Tuck the excess fabric inside the top of the button.
Use the plastic, blue piece to push the back of the button into the top of the button.
All finished!
Follow this tutorial to assemble your covered button flip flops!
And you will have pretty, happy feet!


Now what to do for the boys?

Wednesday, August 18, 2010

I Am in Love with...


this fabric!

I saw them here. I absolutely loved these leggings and knew I had to try them out. So I headed over to Ruffled Fabric and looked at all of their beautiful color choices. I chose the yellow with white polka dots (I think I got the last of it...sorry:))

The very next day one of my favorite blogs MADE had used the ruffled fabric to make most adorable tankini. I loved this look too!

So....

I made Carson some leggings using the Lil Blue Boo Lil Leggings pattern. Then I paired them with a white T with eyelet flutter sleeves from Carter's.

The leggings are so easy to make. It took me about 20 minutes cut to finish. You just have to be careful to make sure all of the ruffles are laying down and lined up.

Then I made Clara a top modeled after the tankini from MADE. I made ties at the shoulders. I took a pair of white bloomers and embellished them with some of the ruffles from the fabric. It was super easy. I just cut, pinned and sewed. That's it!
I am sure I will be ordering more Ruffled Fabric!

Thanks for stopping by...happy Hump day!


Friday, August 13, 2010

Frugal Friday


Happy Friday everyone! I have really gotten into upcycling clothes lately. There is something very satisfying about taking an old or unwanted piece of clothing and turning it into something "new" and useful. You know the saying, "One person's trash is an other person's treasure." So, each Friday I am going to post pictures of a thrift store find refashion. I will be calling it "Frugal Friday." Here are pictures of my very first Frugal Friday thrift store refashion!

I found this orange and white gingham ladies shirt for $2. It's simple and I actually would have liked it for myself, but it was too small for me.

So I used one of Carson's dresses and made a pattern.

I made the front of the shirt the back of her dress and added 4 button holes and 4 buttons.

I also made a pair of leggings to match. I used Lil Blue Boo's Lil Leggings pattern. I embellished the bottom of the leggings with scrap pieces from the shirt.

I thought about embellishing the dress, but couldn't decide what to do with it. I kinda like the simplicity of it. It reminds me of Orange Cream Soda...

Or creamsicle...mmm

That old, unwanted shirt made the perfect outfit for just hanging out..

and watching the people pass by.

Here are some links to inspiring blogs with refashion ideas, tutorials and patterns!

I would love to see pictures of your refashions or whatever else you are up to. Link up toFabulous Friday Follow.

Have a wonderful weekend! See you later!

Wednesday, August 11, 2010

Embellish...A Tote: Tutorial


Turn a plain tote into something fun and personal!
Fancy up your tote with a few simple items...
Simplicity large tote bag ($3 with coupon @ JoAnn's)
6 Grommets (pack of 8...$9)
Fabric (3 pieces measuring 30" in length and 3" wide) I cut some length off at the end and the finished length measures 71". I used Michael Miller's Sea Beauties.
Invisible Ink Pen
Sewing Machine/serger

Are you ready? Let's get started!

Use your stencil and an indivisible ink pen to trace where you are going to place your grommets. I placed the stencil right at the top of the bag. I put a grommet under each handle and one on each side of the bag.

Cut out the middle of the circle. I fold the material in half and snip it. Be careful not to cut outside the circle. It can be tricky where the fabric is a little thicker.

There is the finished hole.

Now take the front and back of the grommet and place it around the cut out circle and SNAP! Do the same thing for the other 5 grommets.

Side Note: Here is my little helper...

eating and showing off her new teeth!

Back to the tote...Take your fabric strips. I had three scrap pieces of fabric that I was going to use for something else, but decided not to...that happens a lot! Anyway, my strips measured 3" x 30". Sew them right sides together and you will have one long piece.

Press the seams.

Then fold the material in half right sides together and press. Note to self: I need a new ironing board cover! And to repaint my nails:)

Sew or serge a 1/4 inch down the open side of the fabric. Leave the ends open...do NOT sew them at this time.

Now turn the fabric right side out. The easiest way to do this is to attach a safety pin to one side of the fabric. Now push the safety pin through until it comes out the other side.

Now press the fabric ribbon.

Cut the fabric ribbon on an angle and tuck the raw edge inside.

Sew 1/8" and repeat on the other side of the fabric ribbon.

Viola! Now I thought the fabric ribbon was a bit too long so I cut a few inches off each side and repeated the previous steps...tuck edges and sew.

Much better!

I like to embroider and so I gave it a personal touch. I added an "A" for my niece Avery. She is turning 7 next week and this is going to be the gift bag for her gift. I like giving reusable gift bags/baskets. I mean if you are going to spend $5 on a gift bag that is going to get tossed you might as well spend a few extra dollars on something you can reuse...right? If you don't have access to an embroidery machine you can always do an applique or iron on transfer. This would make a great teacher's gift too!
Thanks for stopping by! Have a great day!

Linking up with...
giveaways


Beyond The Picket Fence

Get your craft on Thurs.


Related Posts with Thumbnails